Entry 003: Slacks
Hello sewist,
Welcome to another sewing adventure with me. Today, I would be sharing how I made these beautiful slacks, starting from the flat pattern making to the slacks themselves.
1. Pattern making/adjustment
 |
| Starting off with the basic trouser foundation. |
For this pattern, I consulted “Patternmaking For Fashion Design by Helen Joseph-Armstrong” for reference. The pattern I used was the slack foundation(ch. 26) and it was pretty straightforward to follow. I made a bit of adjustment by introducing a front pocket for the slack and also got rid of the fly since I wanted the slack to have a side zip. So for this, I didn’t add any zip allowance. I used ¾ inch seam allowance for the pattern because I wanted to give myself enough margin for errors.
 |
| After transferring the pattern and making adjustments for the front pocket. |
2. Material needed
a. Floral fabric: 2 yards
b. Invisible zip
The material I used is a floral sample fabric. The fabric is soft and sturdy and is not see-through, so I decided to do without a lining fabric. Even the pocket was cut out of the design fabric.
 |
| Slacks pattern |
 |
| Cut out the pattern pieces. |
3. Garment construction
a. Pocket construction
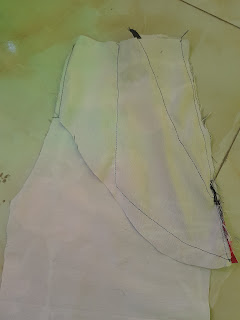
I have never done a front pocket before and I was so happy that the reference text had instructions on constructing the pocket. It was easy to follow through to.
 |
| Stages of constructing the front pocket. (a) |
 |
| Stages of constructing the front pocket. (b) |
 |
| Stages of constructing the front pocket. (c) |
 |
| Stages of constructing the front pocket. (d) The complete pocket. |
b. Trouser legs
Before I started joining the pattern to make the trousers, I had the opportunity to visit a friend of mine, who is an excellent tailor. And he was making trousers when I got to his place and that was the perfect moment to observe the steps he took to make those trousers. He started with constructing the pocket, joining the front piece together by stitching the fly and inserting the zip(I skipped this part because I am using a side zip), he attached the back pieces to the side, joined the back piece together at the crotch and finished up the inseams of the trouser. That was brilliant and that was how I joined the trouser. I did a bit of test fit at this junction and I was loving it.
c. Hemming and zip
The secret to the perfect hem is hemming glue. Special thanks to my friend for this trick. So I trimmed the trouser leg to the desired length plus an extra one inch to turn the hem, then after, glued the hem with the aid of an iron. For the zip which I always struggled with, I went ahead to hand-stitch it to the side seam on the left( I find it easier), then went back to secure it with the machine. I would have used pins but hand stitching is the easiest method for me.
d. Facing
To conceal the raw edges at the top of the trouser, I attached the waistband as a facing, giving the trouser a bandless look that I admired. I know I didn’t mention it but always press your seams. It makes it easier for every other step to align.
Final thoughts:
I love the way this project came out. I love the wide leg of the slacks, I love the bandless look and the zipper. I am so happy I got the front pockets right and it is such a big flex for me right now. I am so remaking this pattern and maybe try out another version with a waistband and belt loops. At this point, It will do me a lot of good to invest in the invisible zip presser foot because I see a lot of invisible zip in the future.
So sewist, what are your pant making hacks that you will be willing to share?
Please leave a comment below or send a message to me through mail at theestherian@gmail.com.
Until next time,
The Estherian


Well done ❤️❤️
ReplyDeleteMyself and Aeon will come and kidnap it Soon 😌
Beautiful
ReplyDelete